East Course - Belfair 1811


The East Course at Belfair.

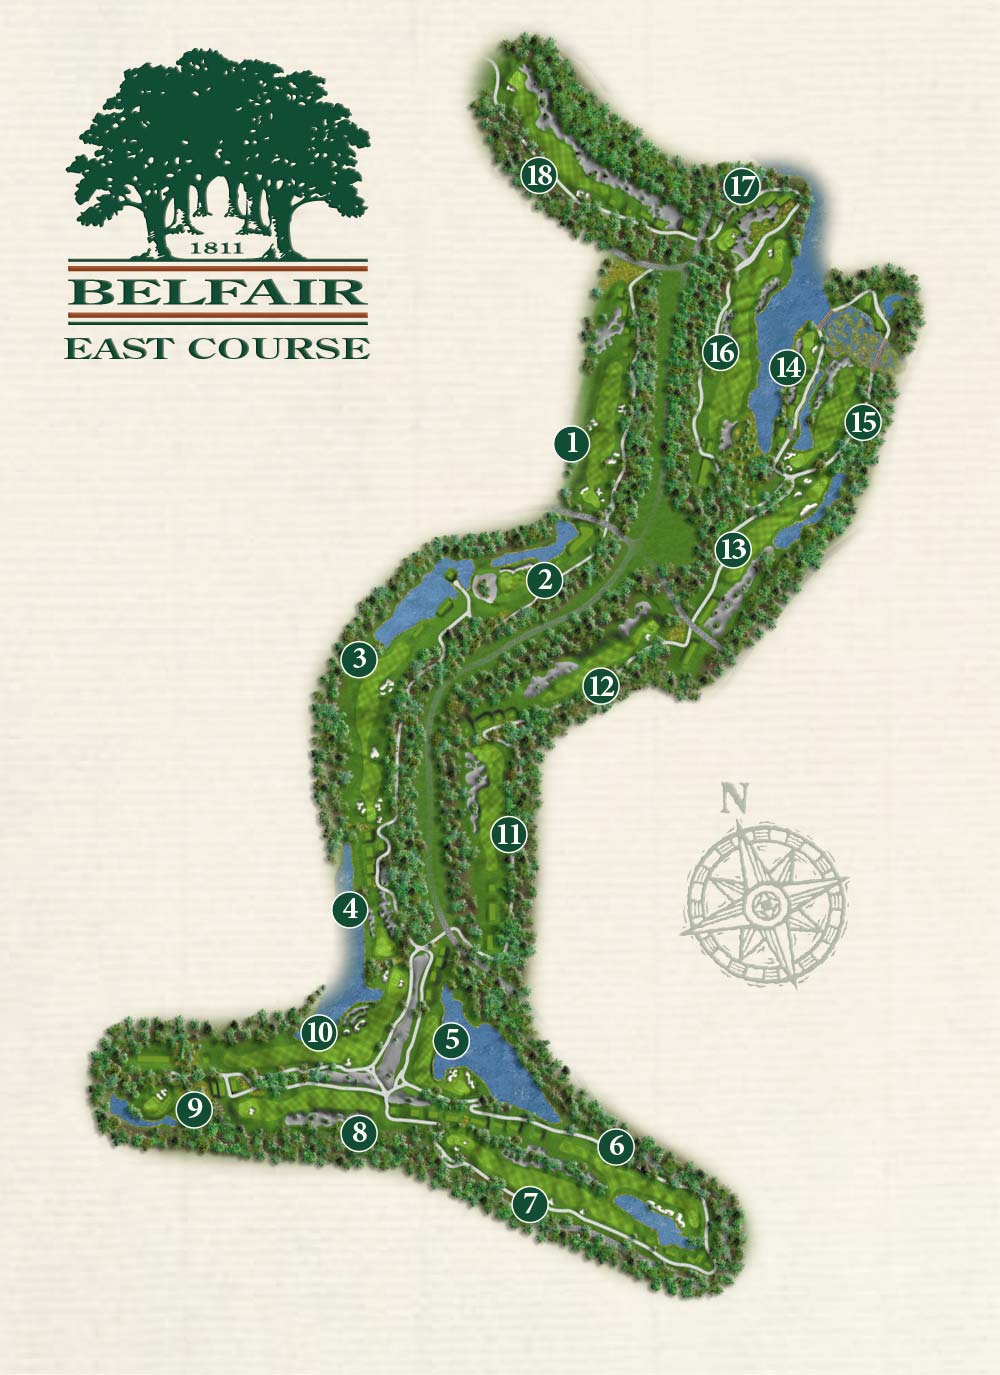
The East Course was designed with the natural beauty of the Lowcountry in mind. Framed by indigenous Live Oak trees, draped in Spanish moss, the East Course includes numerous naturalized sand areas, native grasses and open landscapes that greet the player in a similar fashion to Spyglass Hill. When playing the East Course, you will feel transported into a more rustic course design that finishes with a beautiful lowcountry setting next to the pristine saltwater marsh and the Colleton River.

Take a virtual tour of Belfair’s East Course.

Playing the East isn't for the faint of heart.

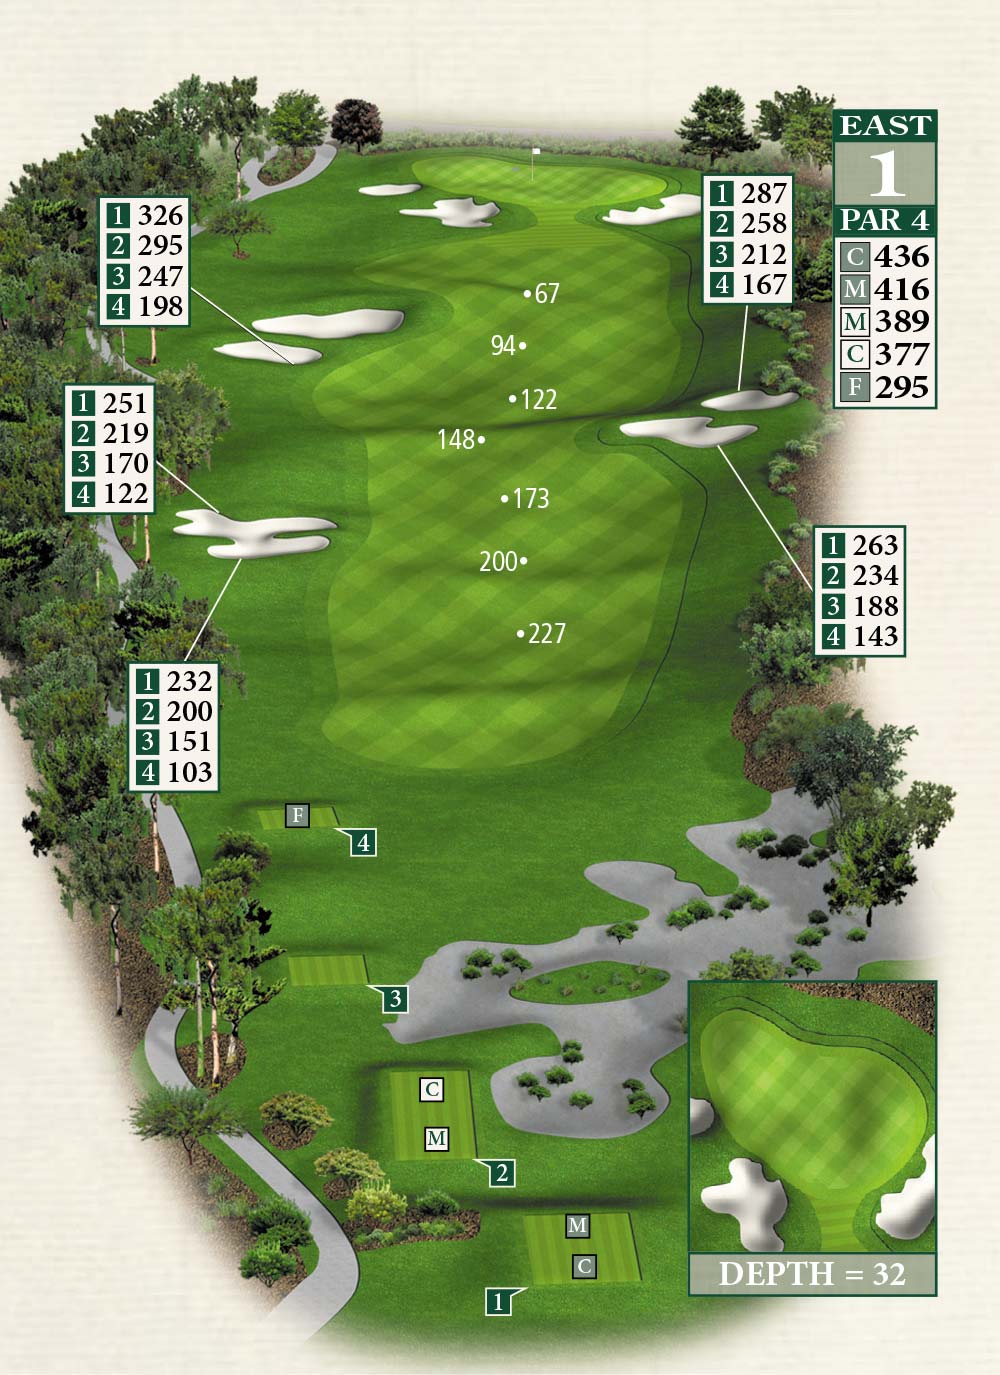
HOLE #1
Great opening par 4 with rolling fairway and a well bunkered green.

HOW TO PLAY
Driver hit down the left center will give the player a long to mid iron into the green. Be careful green is guarded by two very deep bunkers both right and left!

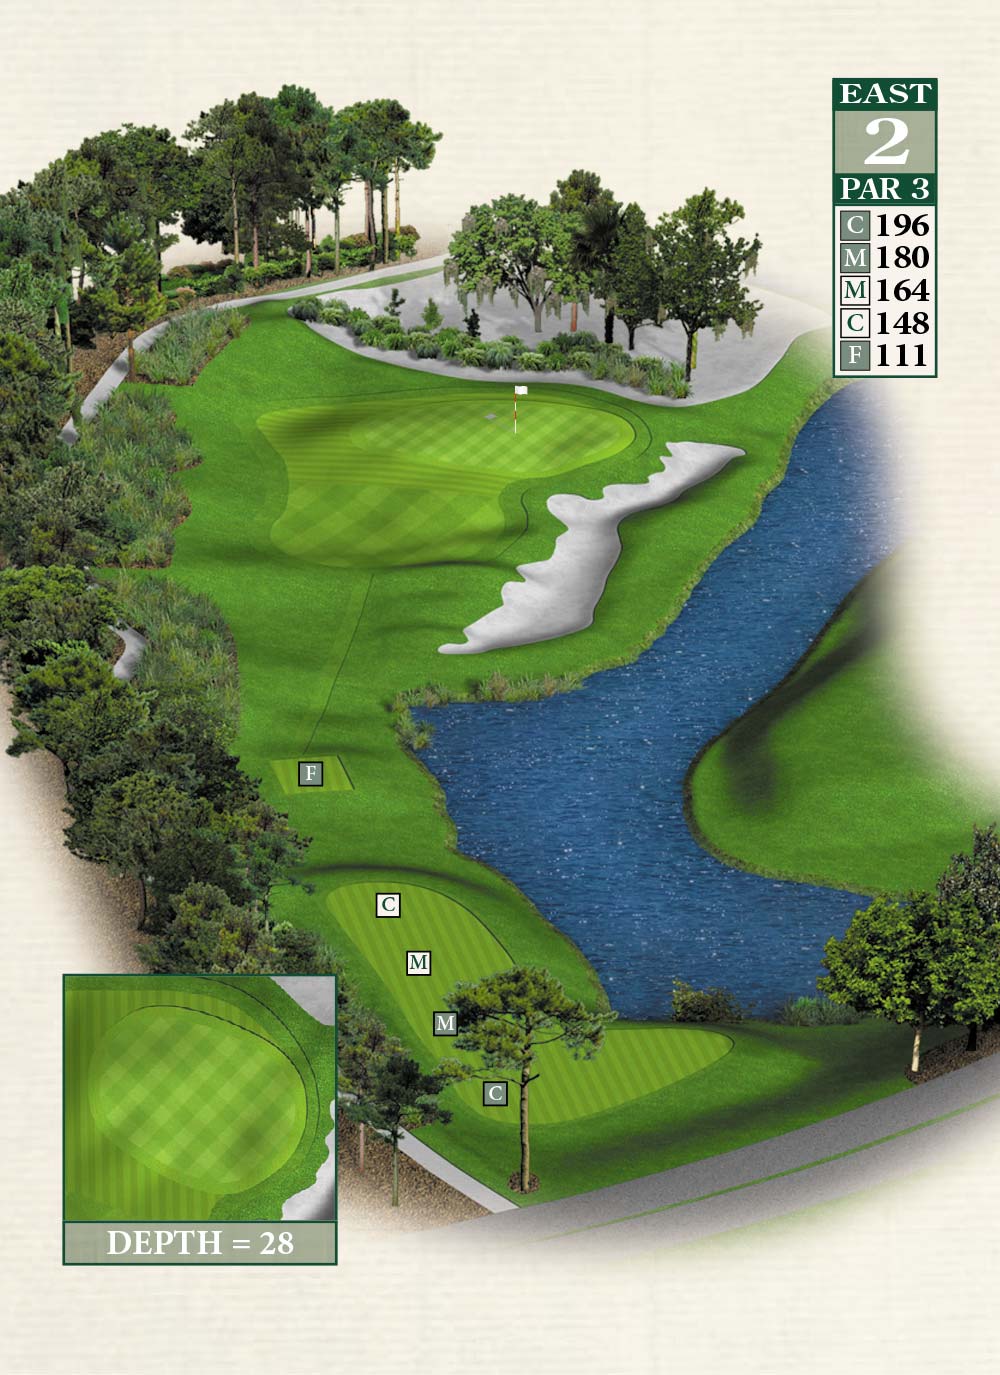
HOLE #2
Beautiful par 3 with water and a naturalized sand area down the right side.

HOW TO PLAY
Long to mid iron selection should put the player on the green but the fun has only started. Putting green is very undulated and slopes from back to front placing a premium on keeping the ball below the hole!

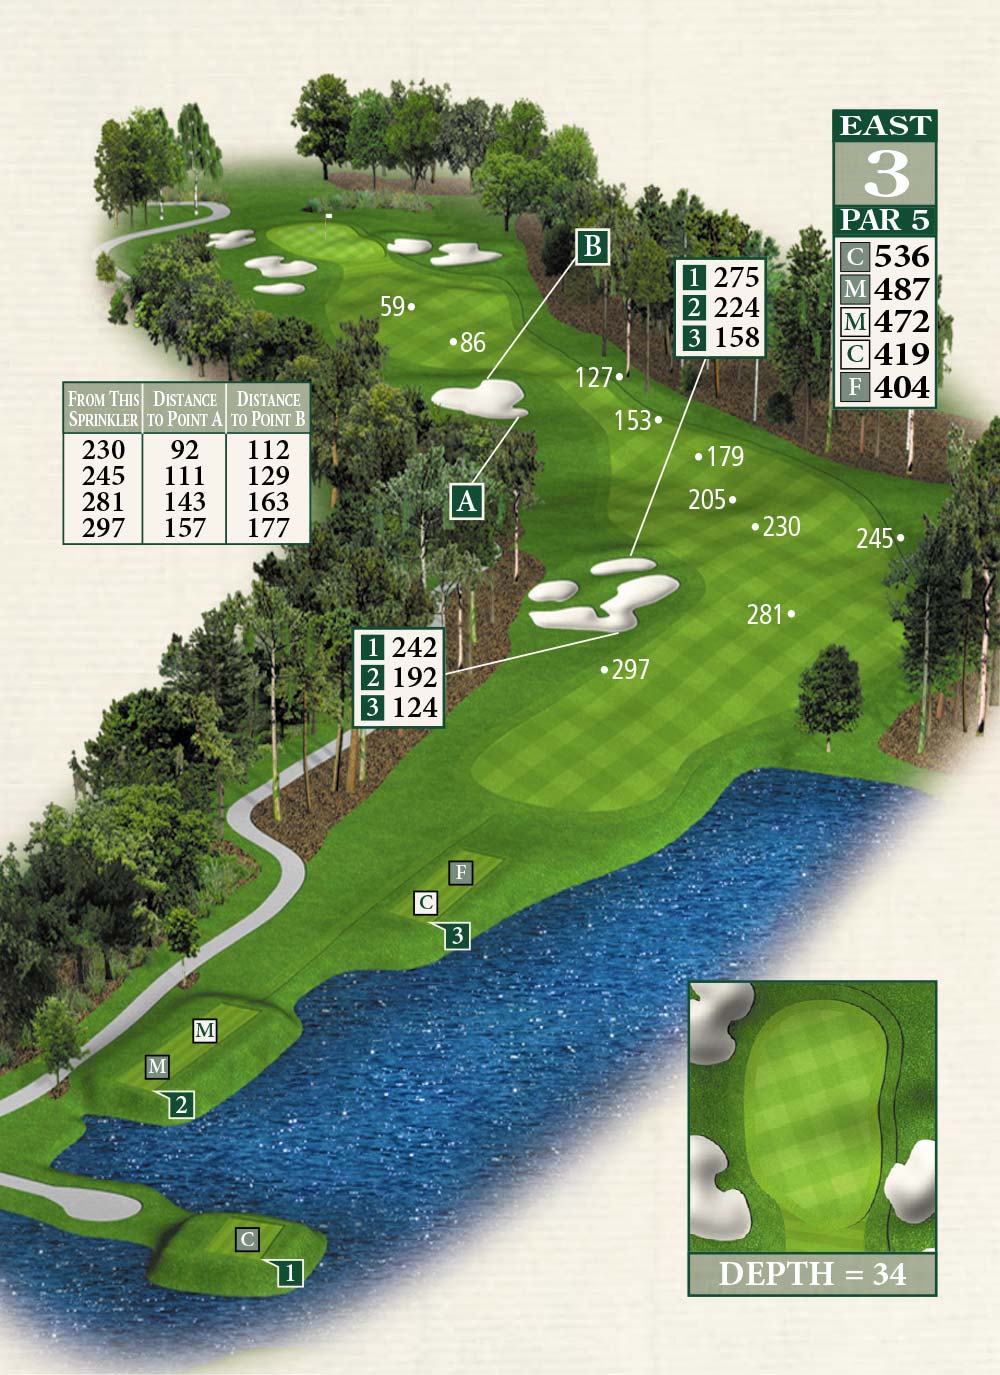
HOLE #3
Opening par 5 and one that could be hit in two. Elevated green gives the player a different feel than a traditional Lowcountry golf experience.

HOW TO PLAY
Players can bite off as much as they feel comfortable down the left side but a poor tee shot will land in two huge fairway bunkers. Players are left to navigate a pinched landing area that requires a solid third shot to reach the green.

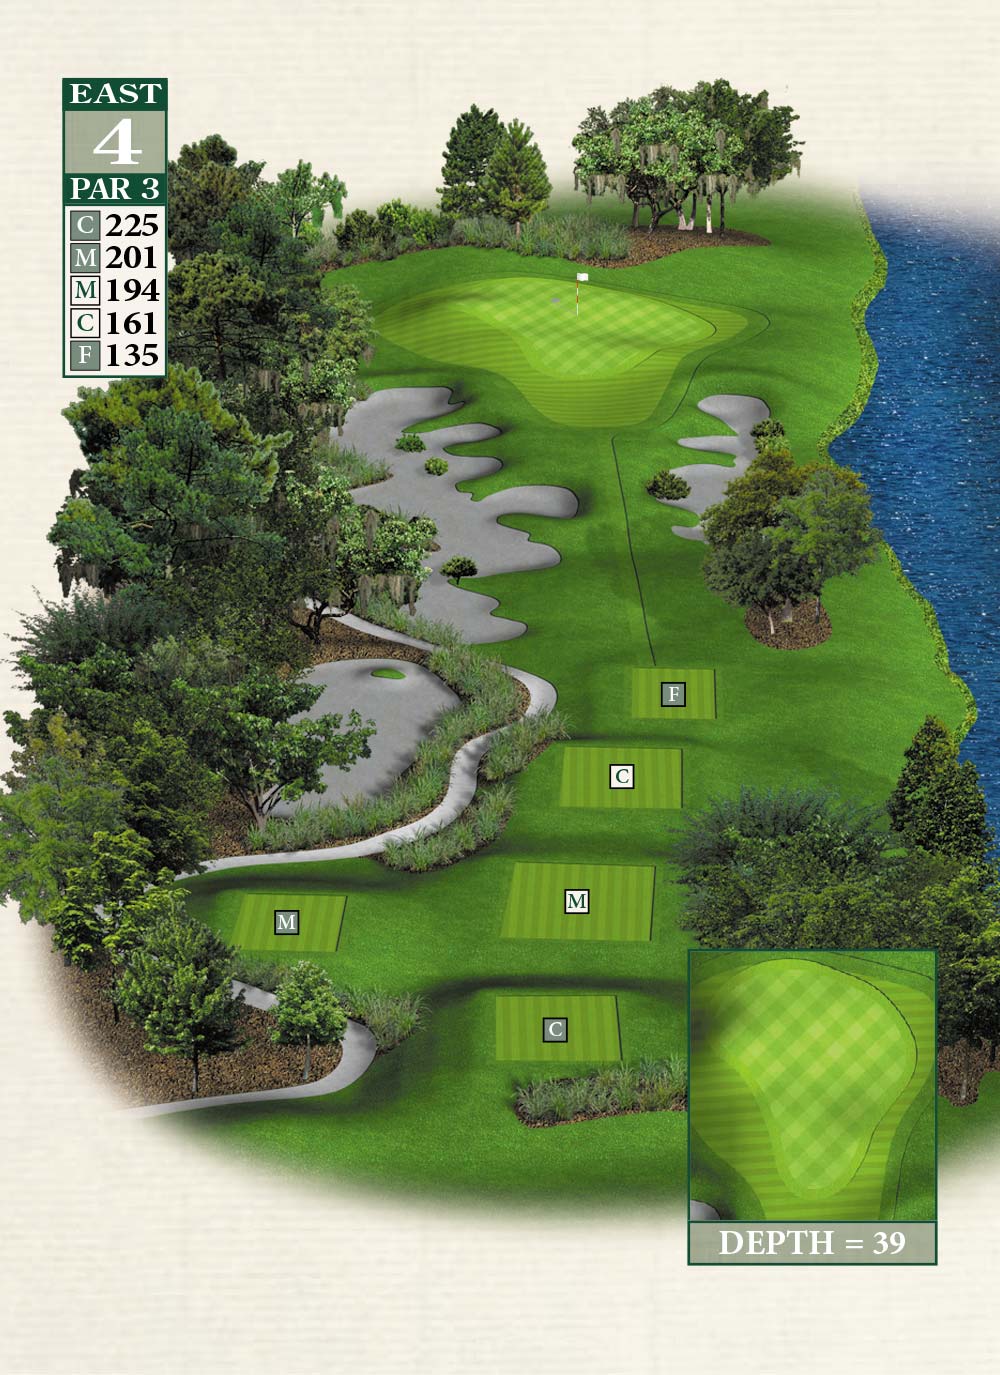
HOLE #4
Longest par 3 at Belfair measuring over 225 yards from the championship tees and also the most difficult.

HOW TO PLAY
Players are presented with a large green that will accept a well struck shot from a fairway wood to a mid iron depending on tee selection.

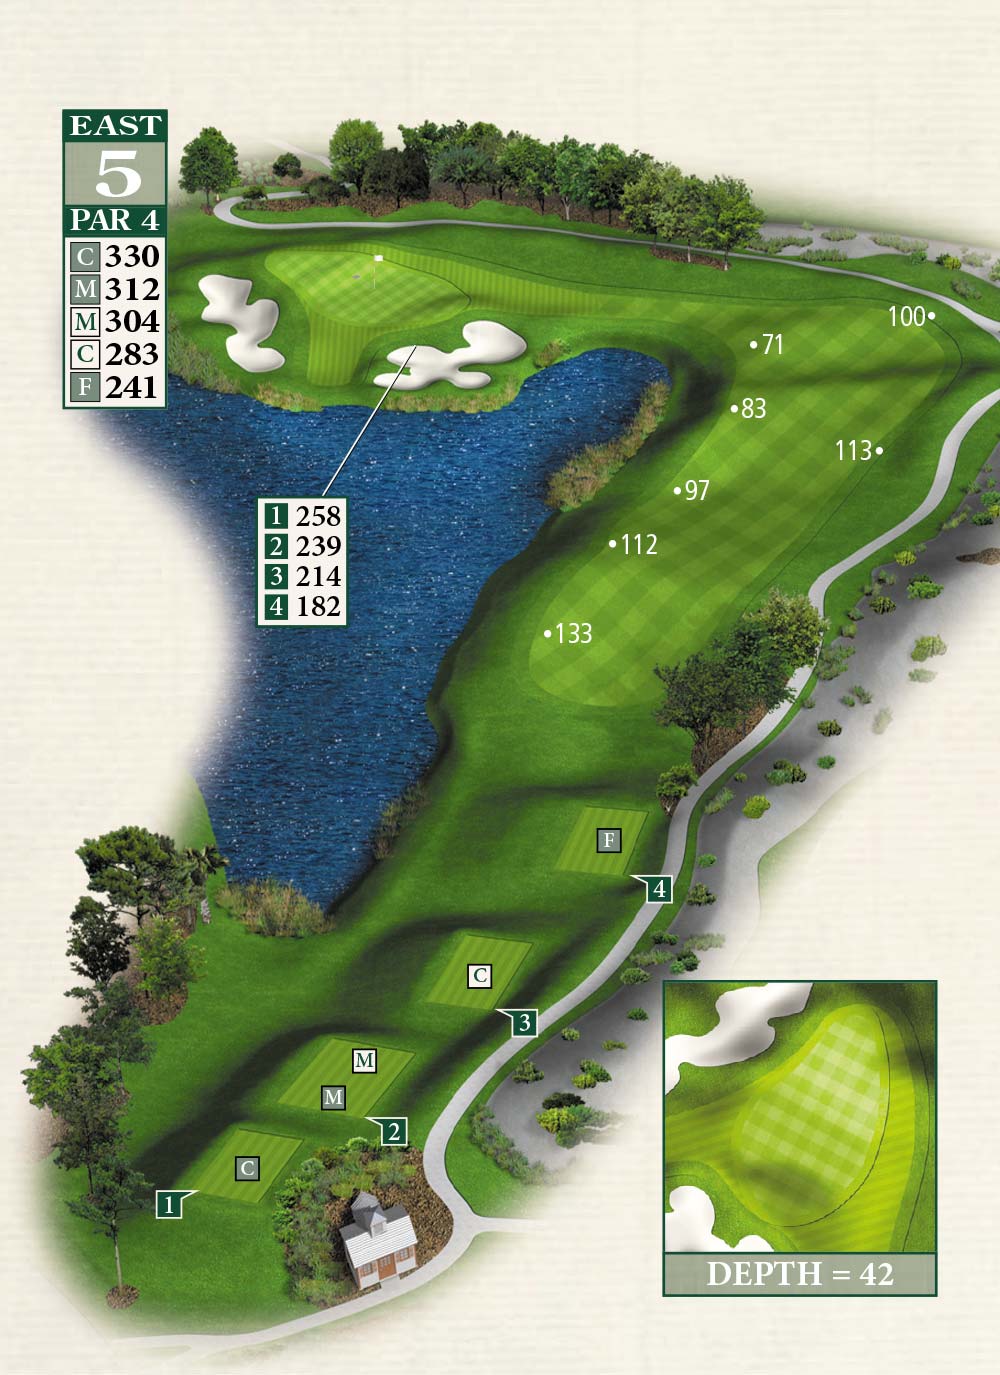
HOLE #5
For some, this hole is a drivable par 4 with a 200-yard carry over water but definitely a risk-reward for all players.

HOW TO PLAY
Players can hit anything from a driver to a rescue club to find their choice of landing area. For most however the second shot will be with a mid to short iron to a long saddle back green.

HOLE #6
Hardest hole on the front nine. This par 4 demands a player's best drive and second shot to reach one of the smaller greens at Belfair.

HOW TO PLAY
A well hit driver will give the player anything from a fairway wood to a mid iron depending on their distance off the tee. Accuracy is at a premium on the second shot to a well bunkered green.

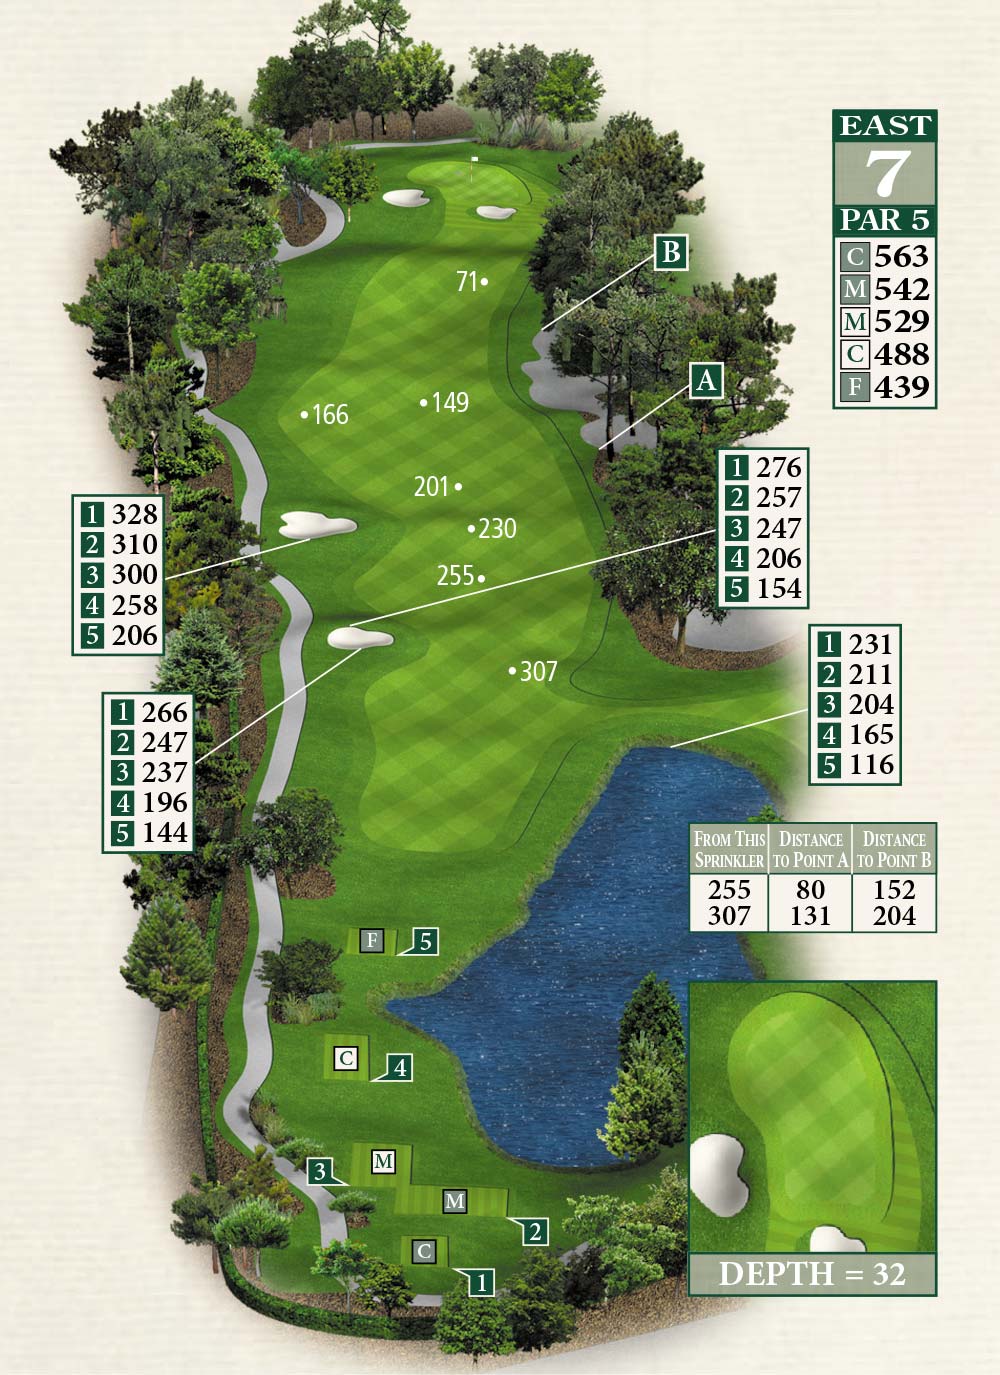
HOLE #7
Long par 5 that lay be one of the more difficult driving holes on the golf course.

HOW TO PLAY
A well placed drive allows the player to hit a fairway wood for their approach to an elevated green that is protected by a well placed bunker just in front of the green.

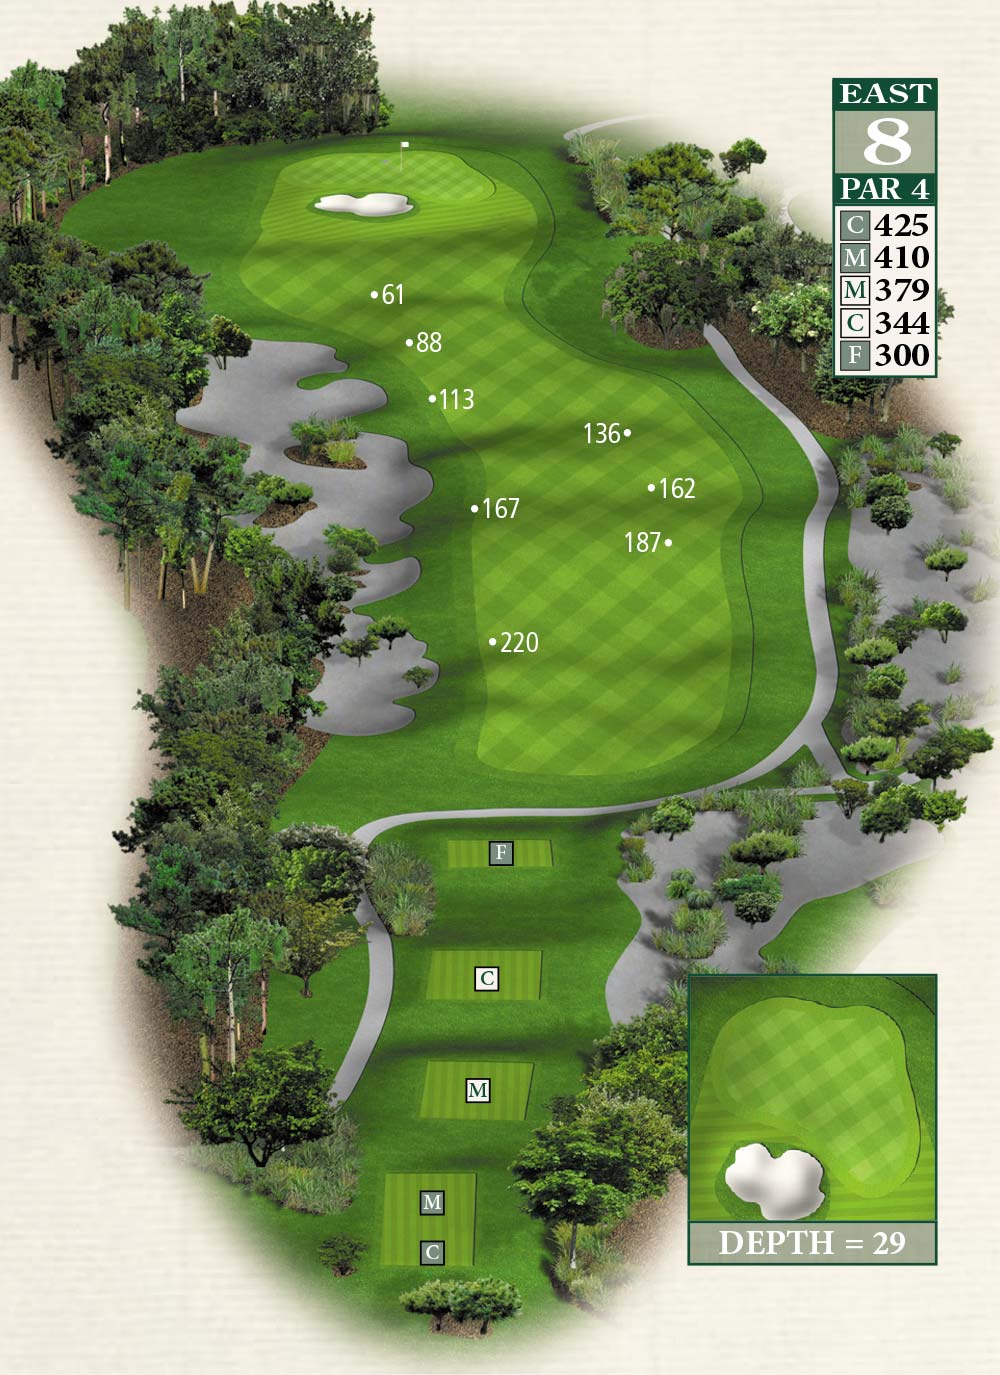
HOLE #8
Second hardest par 4 on the front nine that combines our native grass hazards on the right, along with a long formidable naturalized sand area on the left.

HOW TO PLAY
A well-placed drive down the left center of the fairway will open up the hole for the second shot. Too far left and any shot may be blocked out by the well-positioned Live Oaks. Depending on the pin placement hole # 8 also boasts one of the tougher approaches with a well guarded right side of the green that gives anyone little room for error.

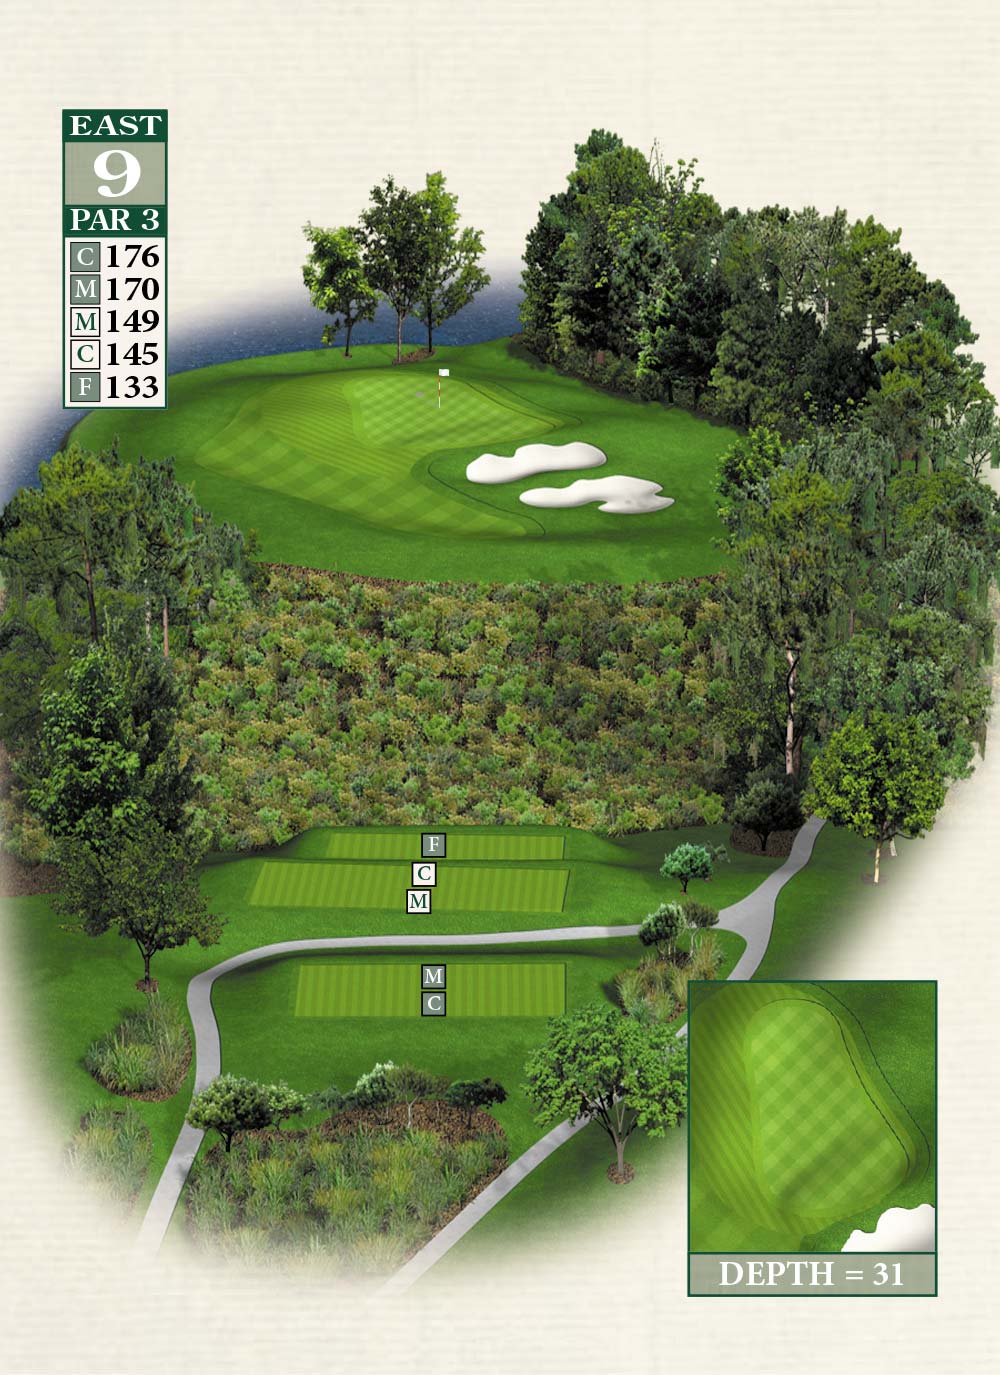
HOLE #9
Short but deadly...hole # 9 is the only forced carry that truly affects every lever of golfer at Belfair!

HOW TO PLAY
A well hit mid to short iron will put the player on the green but be sure to properly gauge your distance as the approach narrows on the right and many players run out of green on overshot approaches.

The back nine will challenge you at every turn.

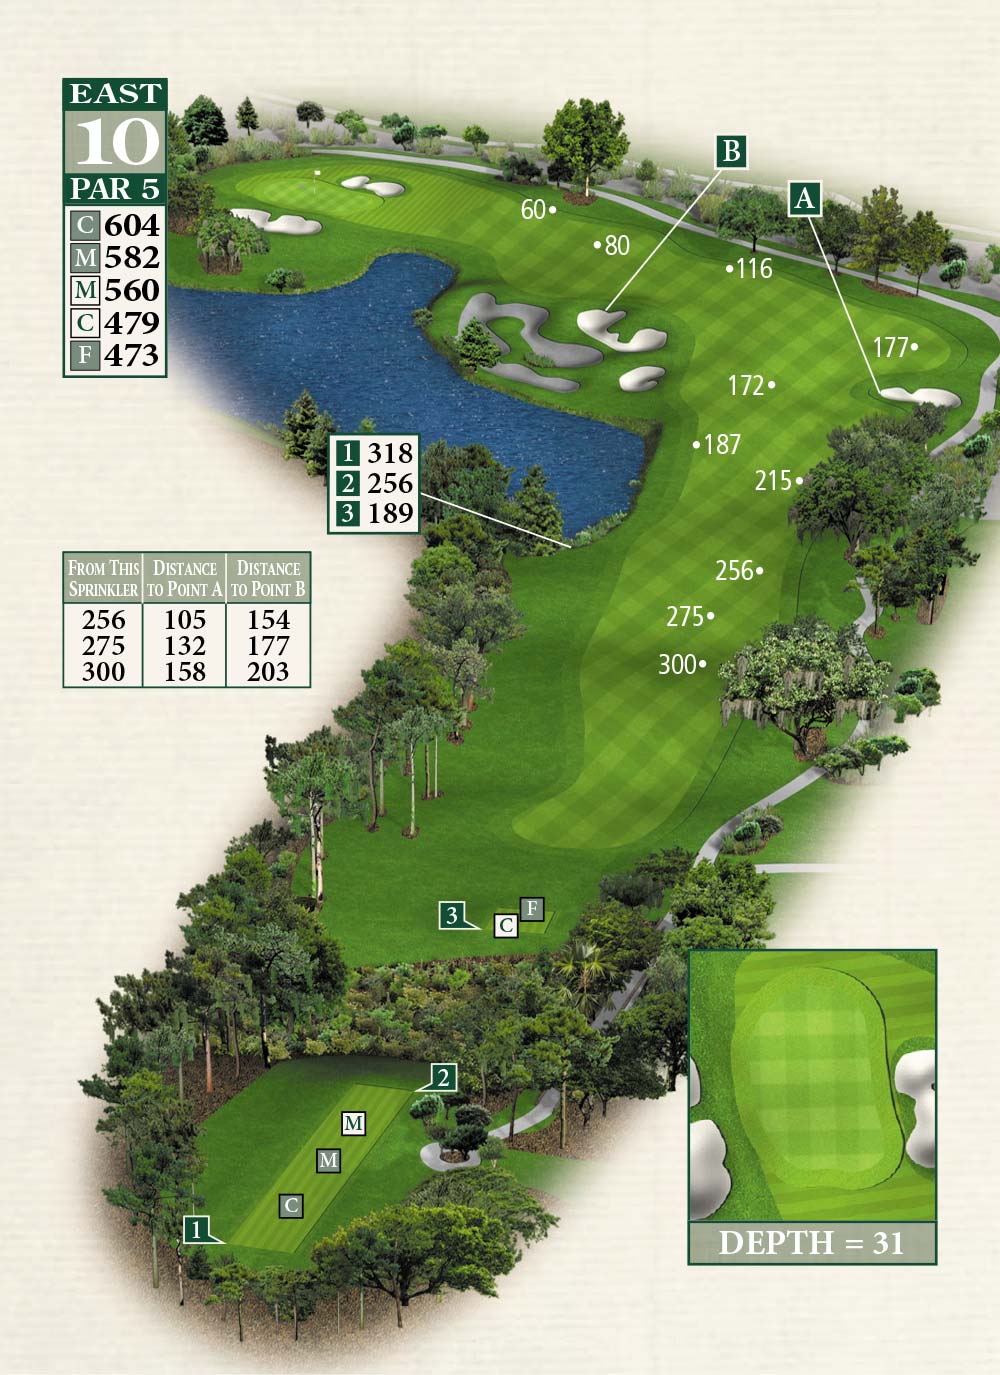
HOLE #10
Longest par 5 at Belfair measuring over 600 yards from the Championship Tees. 10 is a truly a challenge for any level of player!

HOW TO PLAY
Driver, three wood and a mid to short iron will get you home, however this hole also combines two 50 foot elevation changes that will add to your calculations when navigating this very strong par 5!

HOLE #11
Beautiful Live Oaks frame the tee shot on this short but technical par 4!

HOW TO PLAY
A good drive past the Live Oaks on either side of the fairway leaves the player with a mid to short iron into a well guarded green. When the pin is back right, the green calls for careful club selection and distance control, as even well-struck golf shots seem to travel over the green.

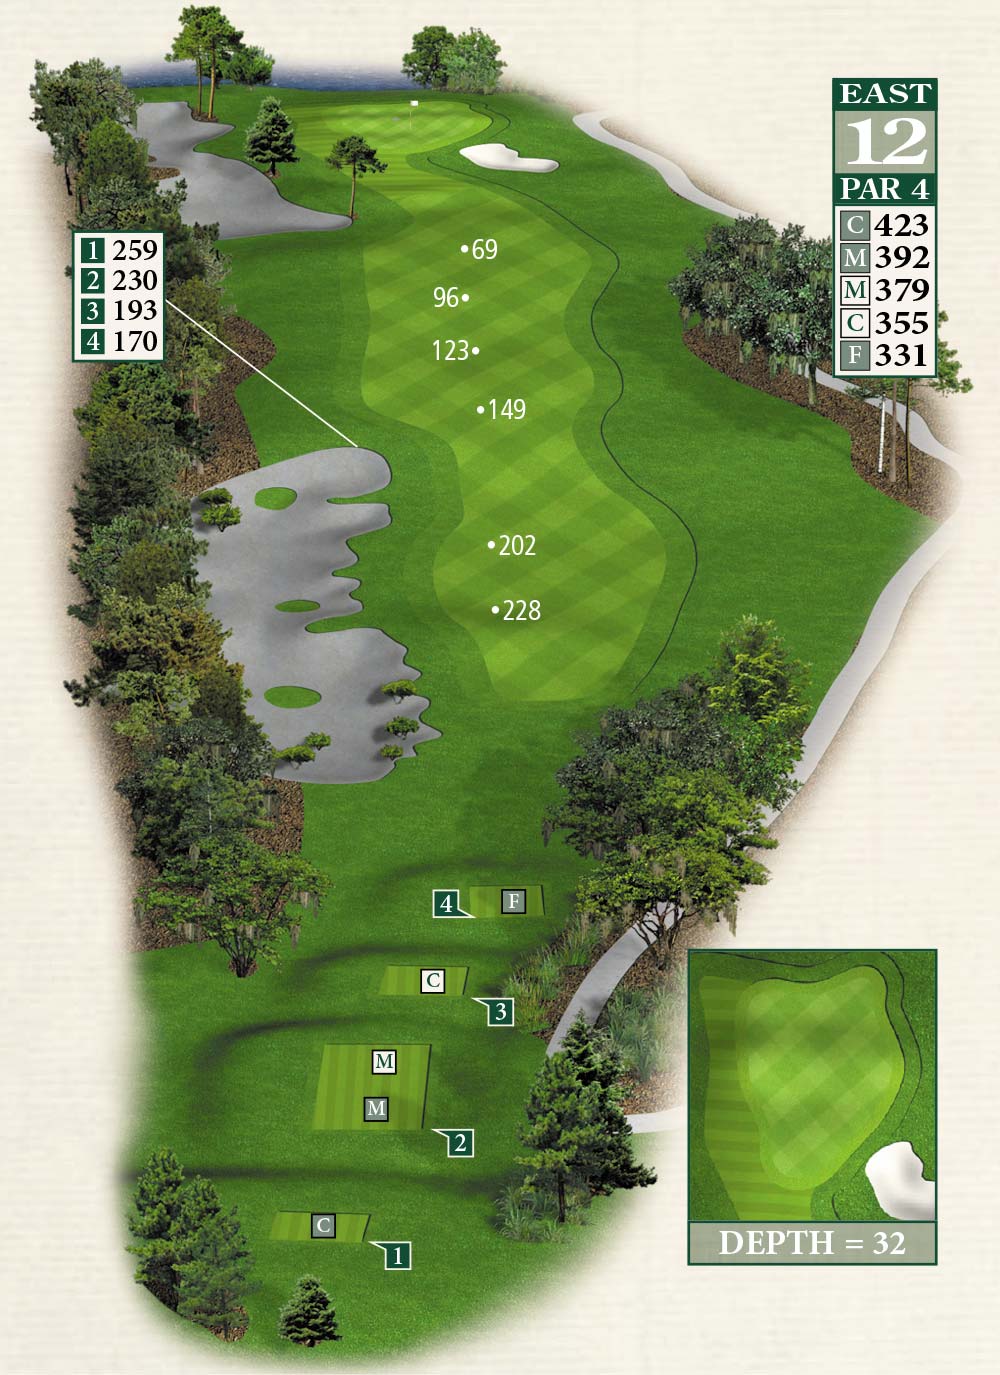
HOLE #12

Perhaps the most difficult putting green to navigate here at Belfair, hole # 12 is also a bit of a challenge for some from the tee box. A well placed naturalized sand area along the left side of the fairway places a premium on accuracy. Once on the green the player is presented with a putting surface that has a defined ridge that sits right in the middle of the green making this green a challenge for even the accomplished putters!

HOLE #13

Hole 13 starts the home stretch on the back nine and makes its way through beautiful costal marshlands. This beautiful par 4 has all the elements seen at Belfair with naturalized sand, water hazards and native grasses properly placed to make this hole pretty.

HOLE #14

Beautiful par 3 that is one of the more difficult tee shots on the east course but also has a full view of the Colleton River!

HOW TO PLAY

Players are presented with a myriad of club choices, however the further you move back the more difficult the tee shot and the need for accuracy. Par is a great score on this hole.

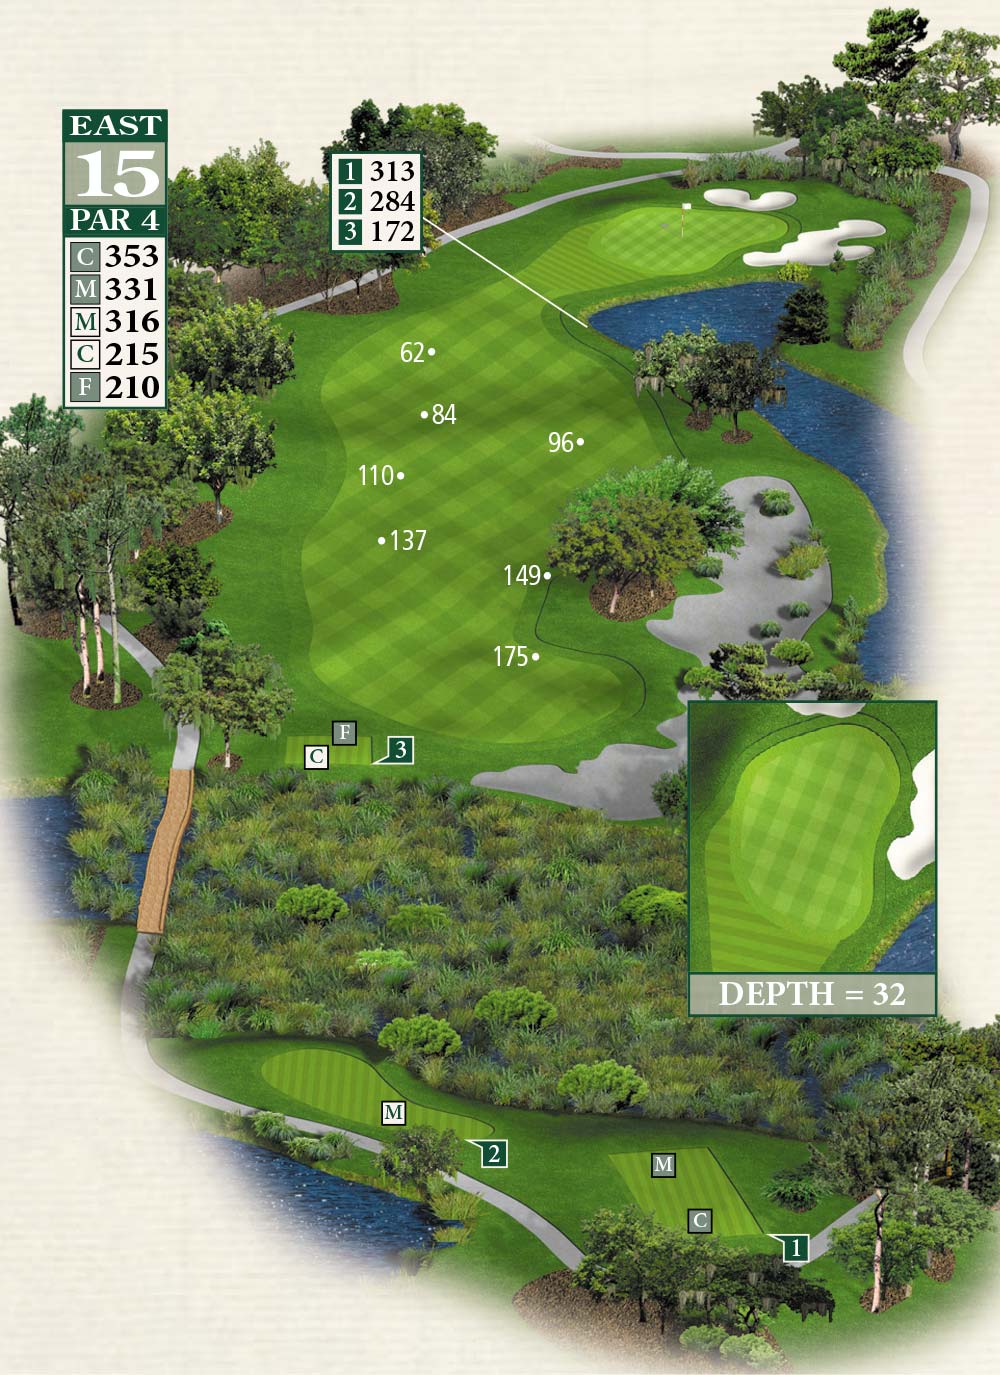
HOLE #15

Short par 4 with a devilish green that requires a solid approach once on the fairway!

HOW TO PLAY
A good drive down the left side of the fairway will open up the green for a mid to short iron into what may be one of the fastest greens on the East Course.

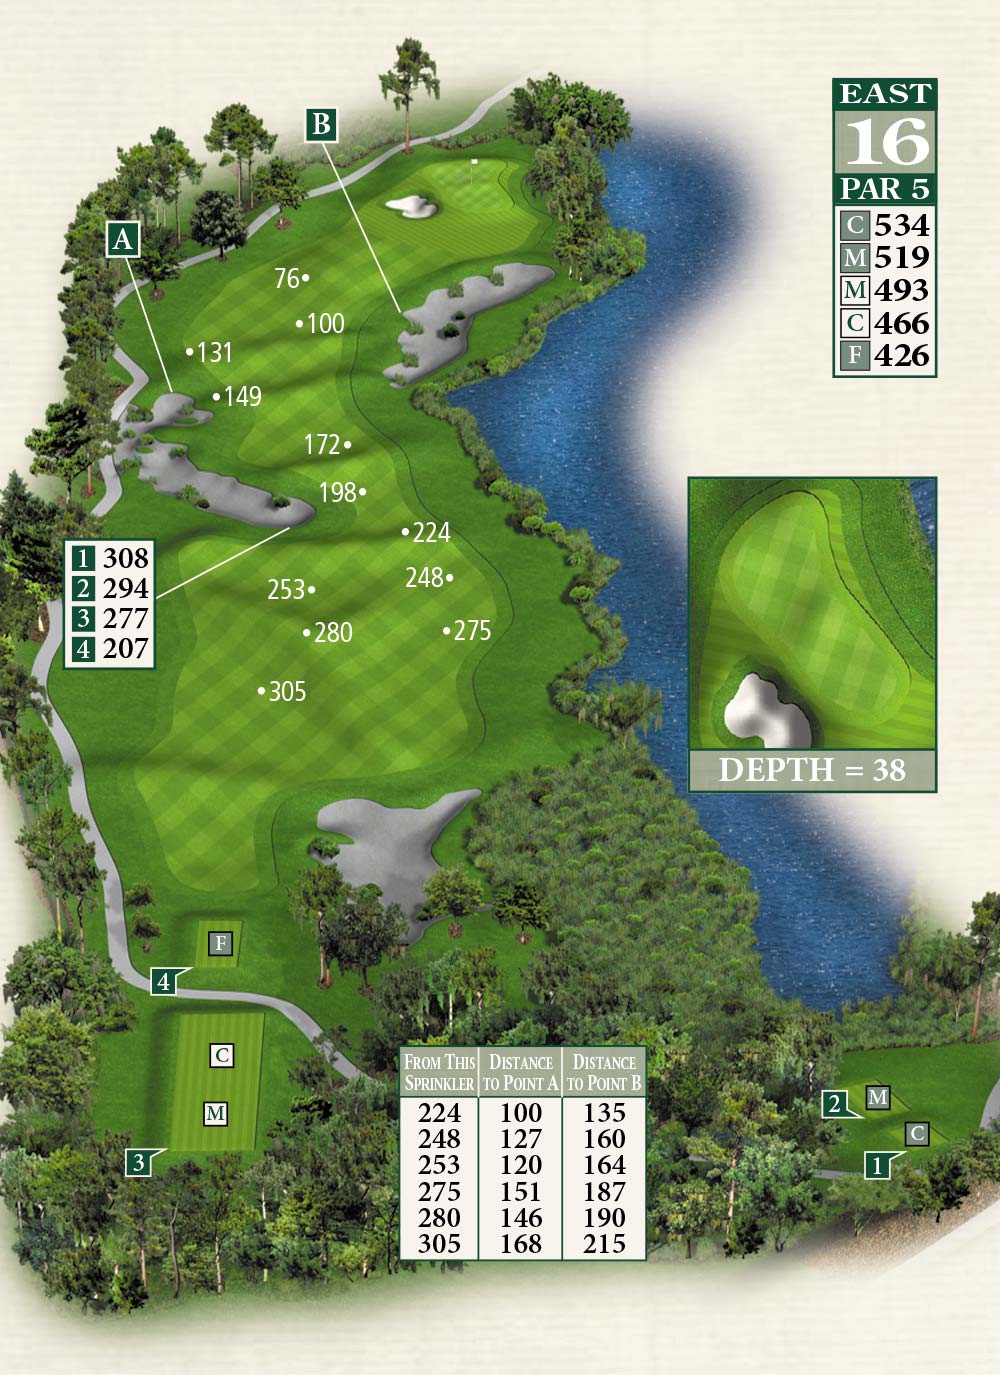
HOLE #16

Picturesque par 5 hole that runs along the saltwater marsh and is well protected by native grasses and naturalized sand areas.

HOW TO PLAY
Driver off the tee leaves the players second shot to an elevated fairway area. Form here gauging your distance on the final approach is critical, as golf balls that are hit to strongly find their way over the green and into the marsh.

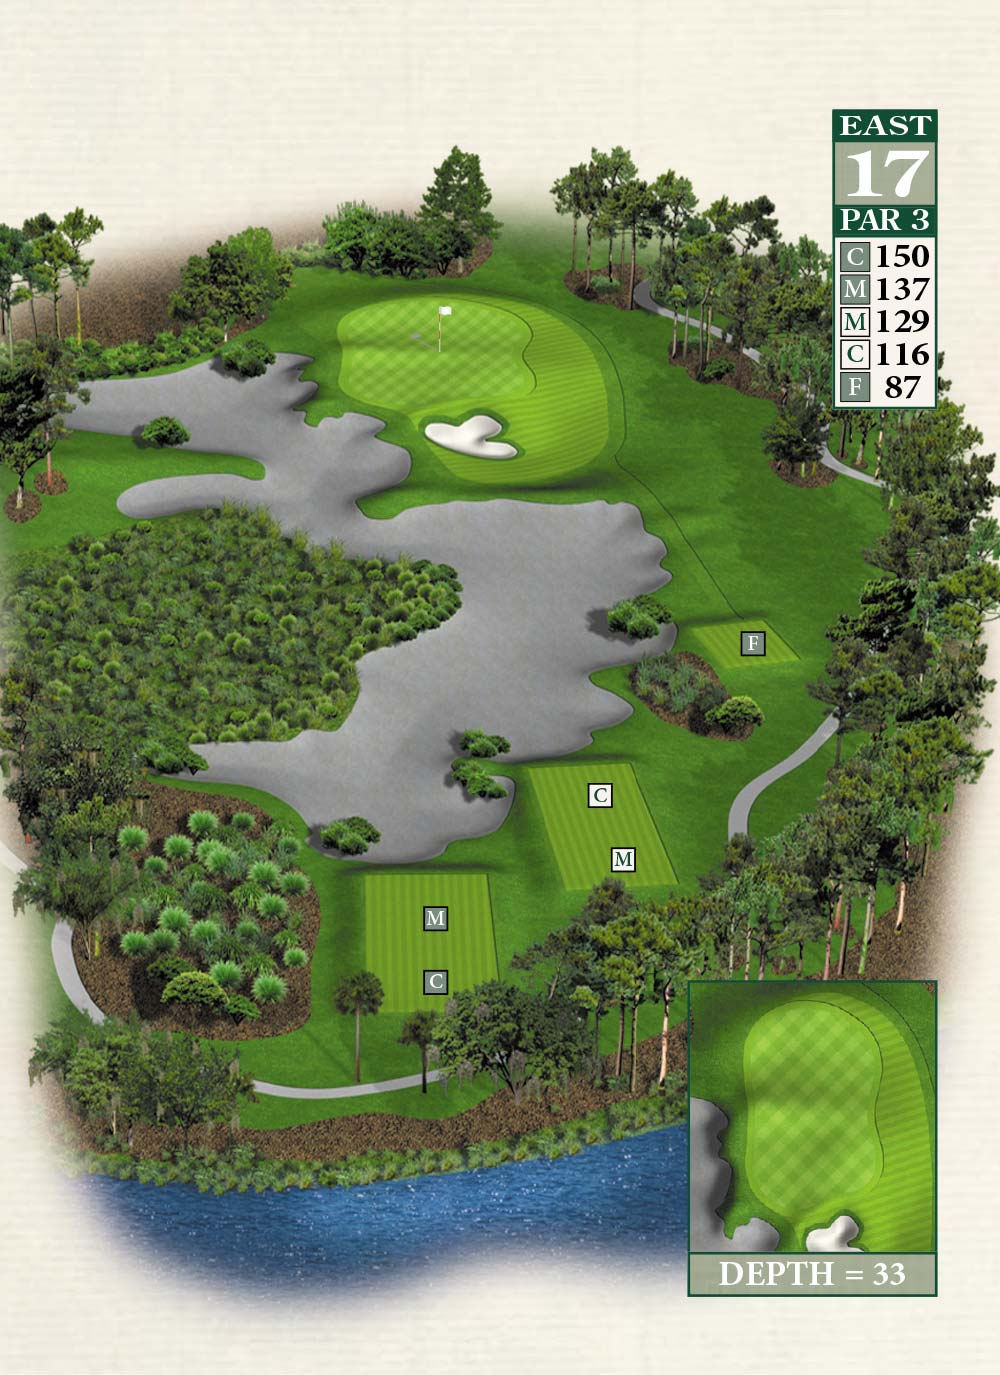
HOLE #17

Almost home! This final par 3 on the East presents the player with a shorter style hole but places a premium on proper club selection.

HOW TO PLAY

Players will hit a mid to short iron to and elevated green that slopes from back to front. Keep the ball below the hole and you will have a good shot at birdie.

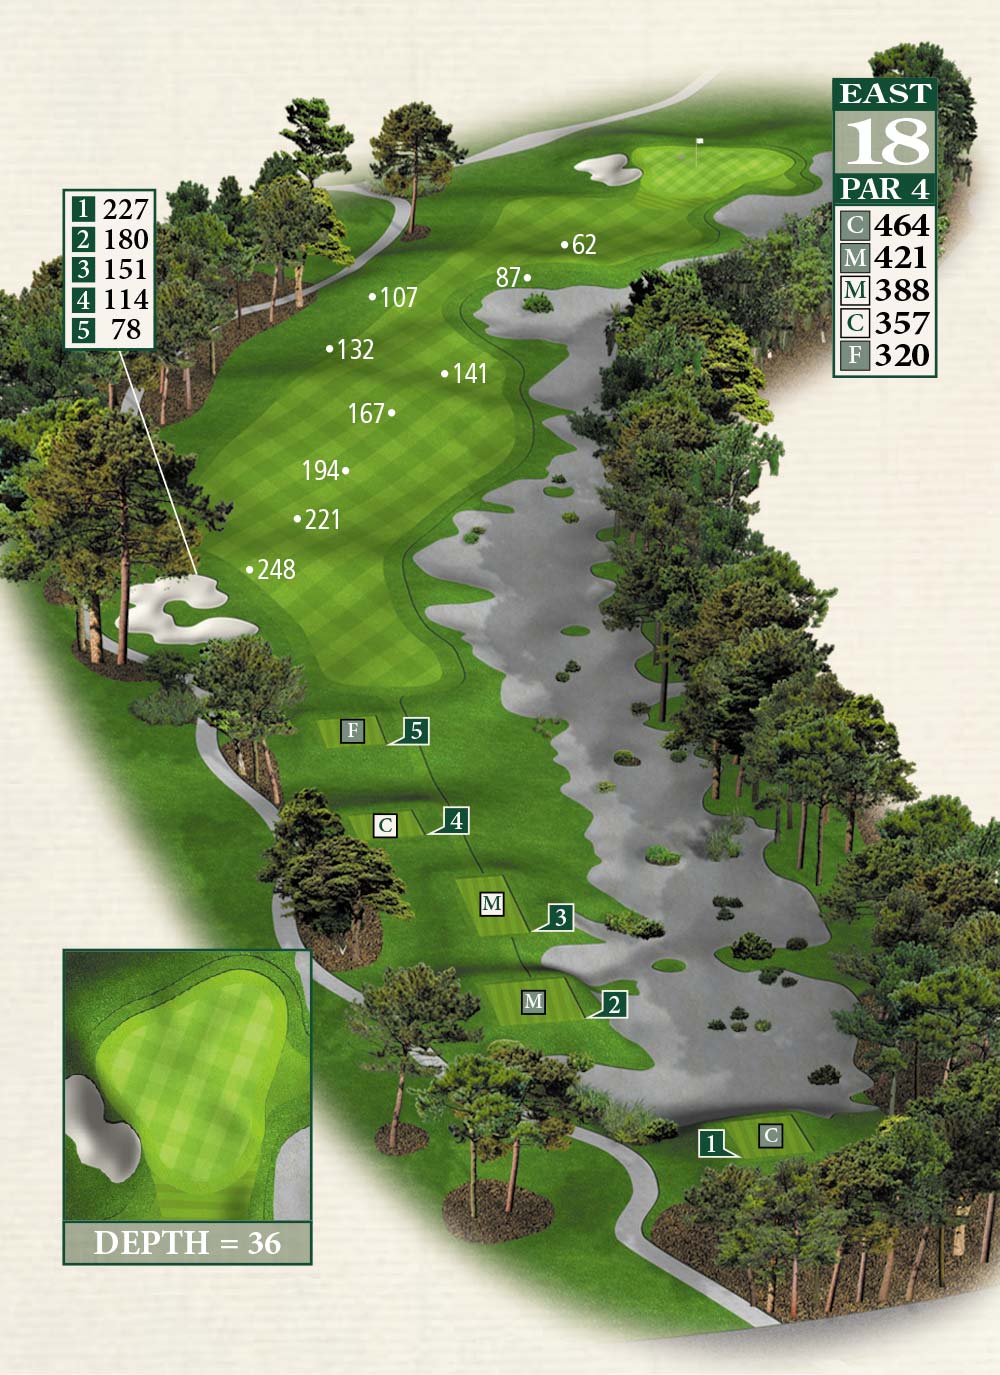
HOLE #18

This finishing par 4 measures 464 yards from the Championship Tees but also places a premium on accuracy and length from every tee.

HOW TO PLAY

A driver, or for the longer hitter, 3 wood will put you in the fairway and short of the cross bunker. A long to mid iron is the play for your second shot but favor the left side of the green as there is a false front to the left that will challenge even the seasoned short game. Finishing with a 4 is a great score for any level of player!

FIND YOUR DREAM HOME.


The Avenue of the Oaks welcomes you to our neighborhood with its spectacular natural beauty. Our members share a passion for great golf, an active and social lifestyle and always being there for their friends and neighbors. Whatever you are looking for in the way of the perfect Dream Home, Belfair is ready to help you.